How to alter images, so that they look good in browser-safe colors.
[webign nav]
to main index
to pro index
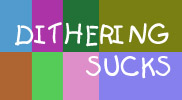
Professional Web Design: Getting rid of dithering
I will not go into details on dithering or safe colors here, because first of all, I've already "talked" about it in the Style Guide, second I will assume you already know something about dithering if you are reading this document.
Ok. I'll be short. Because many users are using 256 colors palette (although most users have $100 video cards that are capable of displaying 24bit on 1024x768) and most designers design in high-color 16bit or true-color (actually, Photoshop usually crashes in 256 colors). And so we get into all sorts of problems, when an image looks good on our computers but it looks ugly on everybody else's.
Netscape uses a special "fixed" palette on 8bit color systems. So when Netscape has to display your 24bit JPG on such a system it has to reduce the color depth somehow. It does it through dithering.
Look at these examples. The image on the left is an original that was made using 16bit palette. The second is the same image displayed by Netscape Navigator on 8bit systems. So you decide, which one is uglier.


Actually dithering can be better. It is just that Netscape (and Microsoft) uses the quickest technique of dithering - random dithering.
So how do you solve this problem. Well, there are several choices. First, you can forget all about it and assume that most users do not surf in 256 colors. Although, because Windows95 default setting is 256 colors, I can assure you that many do. Second, you can download a safe palette and use it when creating text or images. But this technique won't work on photographs, scanned images, etc. Also, it slows down a process of creation a lot. Before you were able to use all colors, regardless. Now you can only use 212 swatches. If you're not used to using swatches, you might even forget all about safe colors until when you're finished.
So, the third choice is to alter the finished image. And this technique assumes that you are using Photoshop for your image creation.
1. Ok. Open the final version of your image in PSD format. Duplicate your image (Image -> Duplicate) Now, choose Image -> Mode -> Indexed color...
2. If you have several layers in your image, you will be asked if you want to flatten your image. Press "OK".
3. Now you will see a dialog window "Indexed Color". Choose dither: "none". Choose Palette: "web" or if you don't have it, download this palette, put it into your Photoshop folder and choose Palette: "custom...".
4. Now press "OK". If you've chosen a custom palette, now you will have to load it (choose "Load..." and find your palette. If you can't find it, check the "files of type" bar, it should say "Color Table (*.ACT)").
5. Ok. You are finally there. The image you are looking at now will look exactly the same on any monitor.
So what if it looks ugly? If you used many different colors, then there will be an obvious degradation in quality. You can try to repeat the same steps with dither: "diffusion". This will work better on some images, especially those that use many colors. But if your image looks good on dither: "none" setting, leave it here.
When you're happy with the image, it's time to save it. The best thing to do is to save it in GIF format, because JPG does not use a fixed palette and if you save your image in JPG, it will change colors a bit and so your image will again have to be dithered by the browser.
Look at the following examples. Top-left image is the original 24bit image. Although it is jpg-compressed, so that it can load quicker. The top-right is the non-dithered image. That's how it will look on all browsers. Bottom-left is a photoshop-dithered image. And bottom-right is a Netscape-dithered image. Dithering in both cases does not differ a lot. The image shown has several areas of uniform (same) color so that you can see how dithering works. The number in brackets is the size of an image.
 original image [9918b] |
 non-dithered safe palette [3024b]
 |
 dithered safe palette [7984b]
 |
 original image in Netscape
|
What if your image looks ugly in both cases? Well, there are several choices. Leave it as it is and make a note that your web site is best browsed in true color. You might even run a small instruction on how to change a color resolution. You might still use one of the resulting images, because even if they are ugly, they look the same to everyone.
Finally, you might try and reduce the number of colors used, complexity of an image, etc. This takes a lot of work and will only be worth your time if it's a main logo or your client actually pays you for it.
Ok. That's all I wanted to say. The final note. Very complex images, images without areas of uniform color are best left as they are. Because in this case pre-dithered images look very similar to the ones dithered by browsers. So if you leave it like it is, it will at least look good on some systems.
And remember that when you reduce a palette, the background color of your image (if it has one) will change as well, if it was not a safe color.
Further reading
The webIGN style guide. Our own style guide. Read it if you want to know the difference between GIF and JPG, more about dithering and other related issues.
Lights page. A very good guide to Netscape colors, and safe palettes. Actually the best treatment of the problem I've seen.
www.lynda.com. Go there to get palette files of different formats.